React vs. Angular Part 3: Change Triggering
March 18, 2019
Introduction
In Part 2, we talked about the fundamental design differences between React and Angular with respect to change detection. It will help to recap how this change detection operates at a high level.
First, a browser event such as a mouse click will trigger a change. Then, the change detection code runs. Finally, the framework will update the DOM.
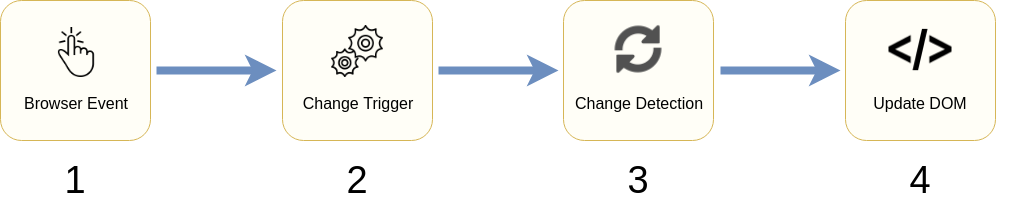
We discussed steps 3 and 4 in Part 2. In this part, we’ll focus exclusively on step 2, the change trigger.
Angular Change Trigger - Zones
If we recall from Part 1, we discussed how Angular has watchers that attach to all browser events. When Angular loads, it will automatically attach itself to any browser events you you create in your code. For example, if we want to attach to a mouse click, we would create the follow code in our template:
<button (click)="clickMe()">
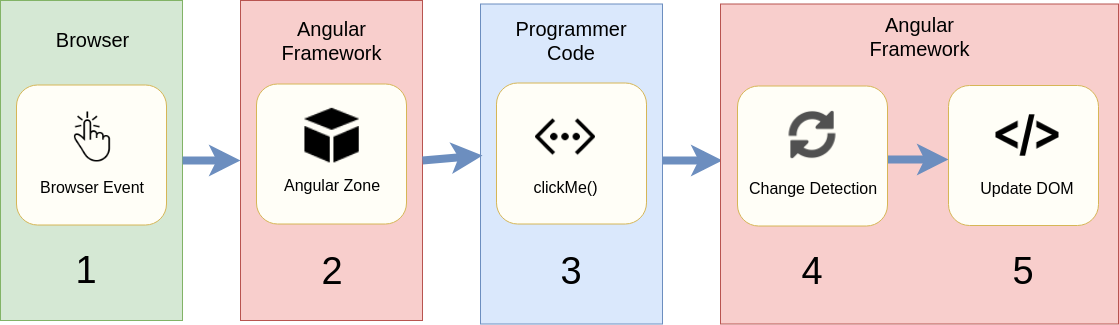
When you compile this Angular code, the (click) directive in the template is automatically wrapped in a special piece of code, called a zone. When the browser click event is fired, the Angular zone first runs the programmer-defined clickMe() function, then calls the change detection code immediately after.
We can also write some high-level code that represents how zones work internally:
// very simplified version of actual source
class AngularApplication {

  changeDetectorRefs:ChangeDetectorRef[] = [];

  constructor(private zone: NgZone) {
    this.zone.onCompleted(() => this.detectChanges());
  }

  detectChanges() {
    this.changeDetectorRefs
      .forEach((ref) => ref.detectChanges());
  }
}
In the AngularApplication constructor, we can see that we are listening for when the zone wrapper code is done executing via this.zone.onCompleted(). Essentially, when the onCompleted() gets called, it means that the zone wrapper code is finished running clickMe(), and now we need to trigger change detection, which the ChangeDetectorRefs will handle. Recall the ChangeDetectorRefs from Part 2.
React Change Trigger - setState()
In Angular world, change detection happens automatically via pre-compiled zones. All we have to do is define our events in the Angular template and the zones take care of the rest. In contrast, in React world, the programmer is responsible for explicitly triggering change detection. This is done via the setState() method in a React component.
Internally, this is a much simpler approach since there’s no zone code that needs to be automatically generated. The developer is responsible for calling setState().
Let’s look at some sample code:
class ReactApp extends React.Component {
   constructor() {
     super();
     this.state = {
       value: 0,
     }
   }

   clickMe = () => {
     this.setState({
       value: this.state.value + 1
     });
   }


   render(){
     return(
         <button onClick={this.clickMe}>
     );
   }
}
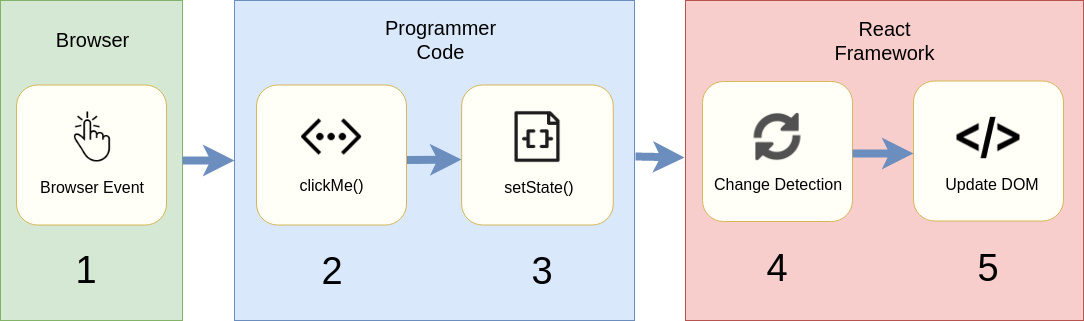
In our render() method, we define a click handler via onClick. The click handler triggers our own clickMe() code where we call setState(). Inside setState(), React’s change detection code runs and updates the DOM.
Conclusion
The key difference between React and Angular is that React expects the programmer to tell it when change detection must run. To that end, it provides the setState() method which the programmer must call. This is beneficial since React doesn’t require as much internal code to detect changes. Rather, it relies on the programmer. Consequently, it is up to the programmer to decide when and how to call setState().
In contract, in Angular, a zone automatically runs in response to any event, which triggers the change detection. As a result, the internal Angular code is more complex since it requires automatically creating all the change detection code via zones. However, since Angular is responsible for creating this code, it can optimize it quite well such that it runs very fast.